How to record a bubble
Step-by-step overview of the bubbles recording process. What's the best part? There are only 4 steps!
Recording your screen is one of the quickest ways to get your point across. But so often, the recording process is needlessly convoluted. It takes more time to figure out how to record than it does to have the actual conversation.
With bubbles, you can share a video in record time. Anyone can do it with a click from their browser. No need to install, upload, sign up, or convert any file. Here’s how:
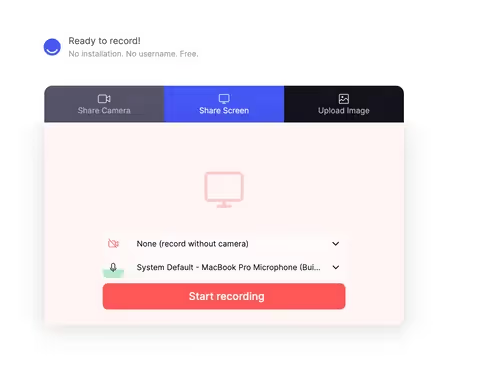
- Go to usebubbles.com. Click the “Start Recording” button
- In the popup window, pick what you want to share – your whole screen, a single tab, or an app – and click “share.” Countdown 3-2-1 and you’re recording!
- When you’re done recording, hit the “Stop Recording” button at the bottom of your screen. [picture of button]
- Share your video with a single click. No sign up and there’s nothing to download – or upload to other systems.
How does it work? Check out this demo on how to report a bug in 90-seconds using bubbles:
Check out more 90-second demos here:
FAQ:
What can I record?
When you start a new bubble, you’ll see three options for recording: Share Camera, Share Screen, and Upload Image. If you use the Chrome extension, you’ll also see an option to upload a web screenshot.
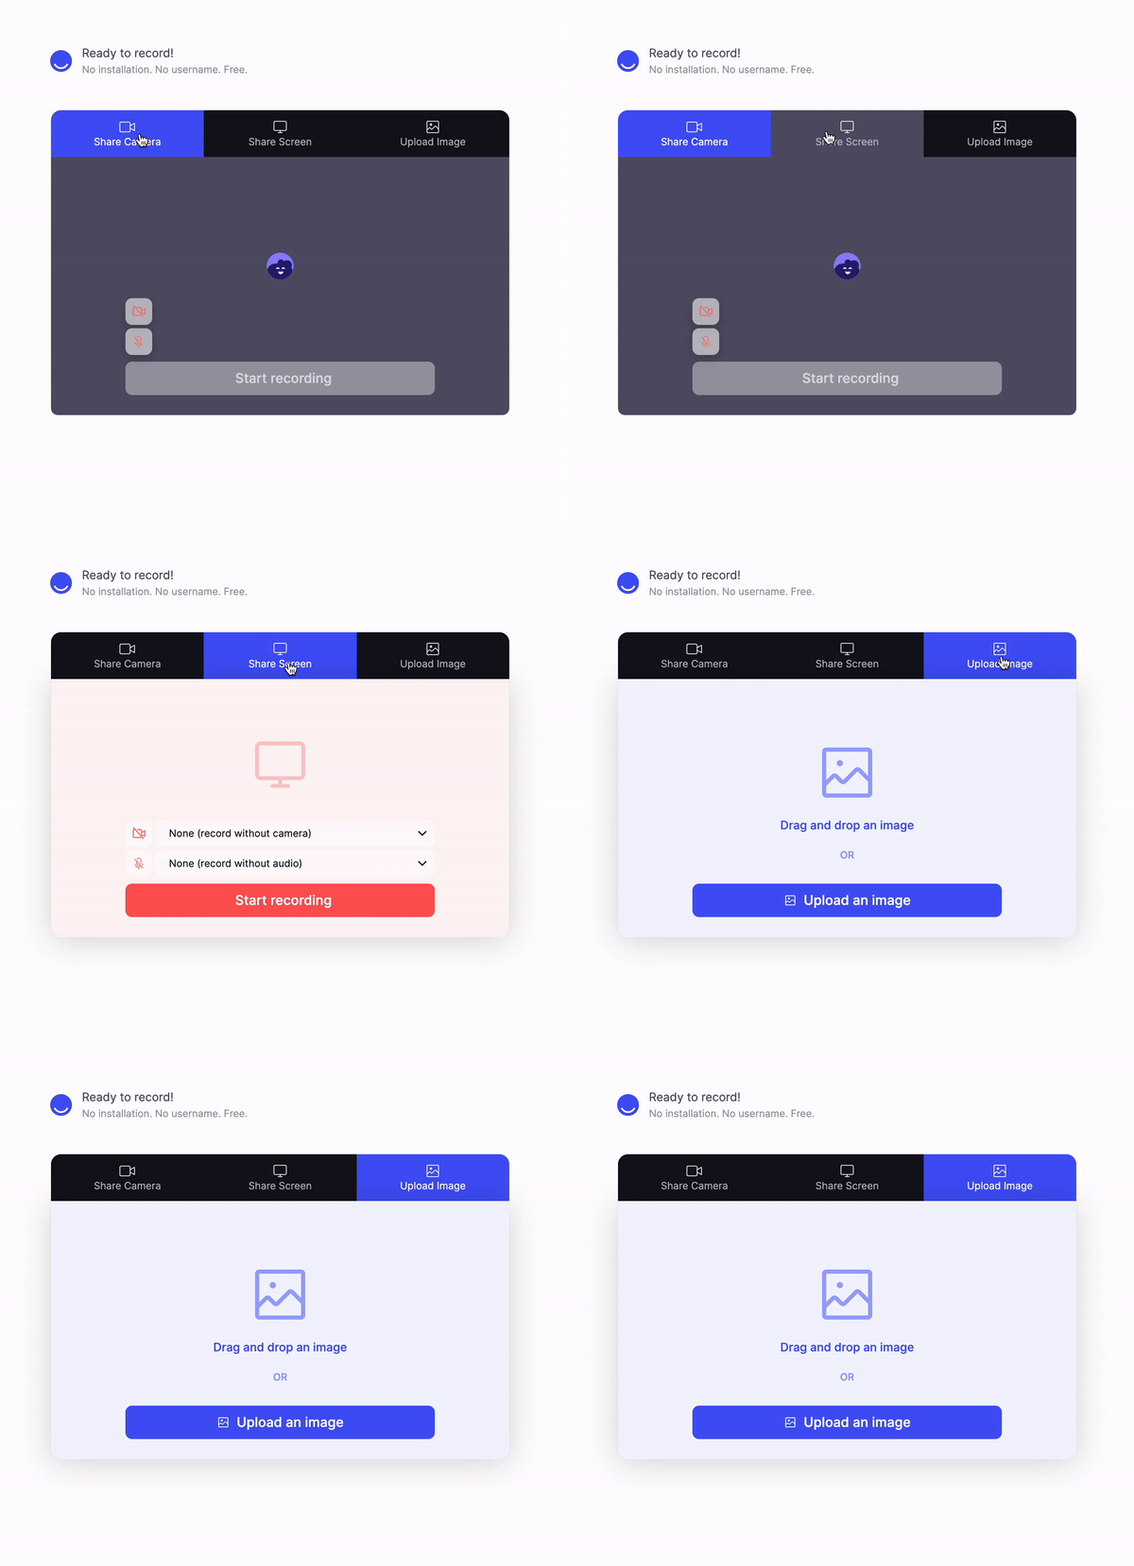
- Camera: This option turns on the built-in camera on your device. You can record yourself talking, but it won’t record your screen.
- Screen (browser or desktop): This is the default option and our most used function. It will allow you to record your screen, as well as your audio and video. (You can also choose to disable the video and audio to create a screen recording with voice only, or without sound.)
- Image upload: This option allows you to upload an image to share with others. For example, you can use it to upload a mockup or design project to receive feedback.
- Web screenshot (only on the Chrome extension): this option takes a scrolling screenshot of your screen, which you can then share with others.
How do I choose what screen to record?
Capturing your screen can be a great way to demonstrate your project, but you may want to be selective about what you show. The different recording options on bubbles solve this problem by offering both flexibility and privacy.
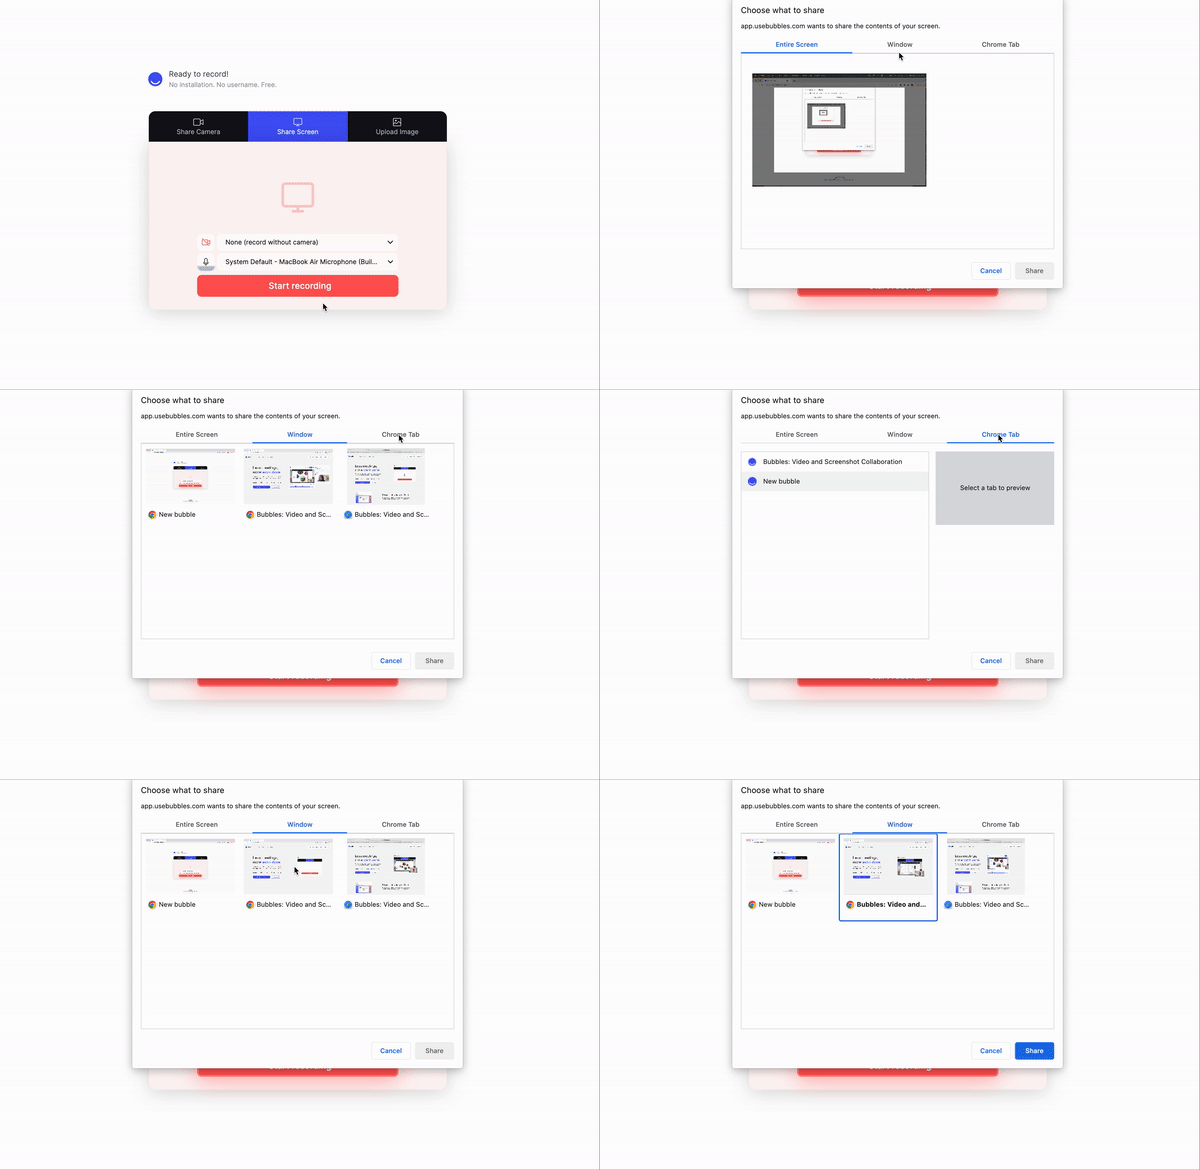
When you hit the “Start Recording” button, you’ll be asked to select from a few options—Entire Screen, Window, and Chrome Tab. Here are some differences and use cases:
- Entire Screen records everything on your screen—this includes all the apps visible on your taskbar, and any notifications you get while you’re recording. Entire Screen is the best choice when you want to switch between windows in different apps in one recording. It also lets you record system processes like the start menu and system notifications.
- Window lets you pick which app you want to record, and keeps recording as you switch between tabs in that app. Some screen recorders let you switch seamlessly. With others you need to keep an eye out for the “record this window” banner at the top or bottom of your screen and click that to switch your recording to the new tab.
With this option, you don’t have to worry about people seeing your notifications or what’s in your taskbar. You do have to make sure you’re ready to bring up the window you selected as soon as you hit record because most screen recorders won’t automatically switch to a non-Chrome window.
- Chrome Tab captures, you guessed it, one tab in Chrome. Think of this as your max privacy option. If you click to another tab, the screen recorder keeps recording the tab you first selected. All stealth-like. It doesn’t record system processes, your taskbar or the line of Chrome tabs at the top of your screen.
How do I share my recording?
Many software programs make a whole process out of sharing and uploading a recorded screen. We’ve taken away that hassle. Save your time, energy, and bandwidth.
Instead of waiting for file uploads and conversions, you can share your finished bubble with anyone, straight from your browser. They don’t need to have an account to view the video. All they need is the link.
Here’s a step-by-step guide to sharing your bubble:
- Once you hit the “Stop Recording” button, you’ll be directed to the finished bubble.
- Give your video a title by clicking on the title textbox. You can always change this later. (If you skip this step, it’ll automatically be called “Untitled bubble.”)
- Click the “Share” button on the top right corner of your screen.
- You’ll be prompted to enter the email address of your recipient(s). Alternatively, you can also click the “Copy link” button to share the URL manually.
Recipients can view the bubble directly on their browser (up to 2X speed) and reply with their own recording at any point in your video. Again, no sign-up required to comment.

When to use bubbles?
Bubbles is the ideal way to communicate across several scenarios. Because you can record both your screen and your face at the same time, it’s great for adding that personal touch to your communication.
People can read a lot from your facial expressions and hand gestures, as well as tone of voice. So the more complex your conversation, the better-suited it will be to collaborating via bubbles.
For example, these are the types of projects you might share on bubbles:
- Design walkthroughs: Share your mockups and prototypes with detailed demonstrations. Direct any stakeholder to the bubble whenever they ask for information on your current design project. Allow teammates to take a look whenever they want a refresher.
- Code sharing: Capture all your work on bubbles and save the back-and-forth text conversations with embedded code snippets. Hold asynchronous conversations at your own pace, take a break from typing, and enjoy the sound of a human voice.
- Product demos: Instead of calling everyone at the company to an all-hands, record product demos people can view thoroughly from any timezone. Allow people time to process and respond with their thoughts so that everyone can participate, not just those who are good at spontaneous brainstorming.
- Process alignments: Make sure processes are captured in detail and prevent them from getting lost in the jungle of project management apps. Minimize the need for follow-up questions and notetaking.
What's next? Facilitating team communication
A tool like bubbles can help you and your team understand each other’s intent and processes. Avoid awkward and unnecessary meetings, distracting real-time text threads, and communication without the full context.
Instead, bring the joy of collaboration back to your workday. See your colleagues on the other side of the world without one of you having to wake up in the middle of the night. Respect each other’s work schedule and pace. Most of all, get your own time back by skipping unproductive meetings.
Click here for tips on how to leave a comment on bubbles and hold asynchronous conversations.
Make your
meetings matter
Loved and trusted by 100,000+ users:
- Automatically Record and Transcribe Meetings
- Extremely Accurate Notes, Summaries, and Action Items powered by AI
- Works with Zoom, Google Meet, and Microsoft Teams
- Save time and follow-up with quick async videos
Simply connect your work Google or Microsoft Calendar to get started.
Collaborate better with your team
Get your point across using screen, video, and audio messages. Bubbles is free, and offers unlimited recordings with a click of a button.
.avif)
Collaborate better with your team
Get your point across using screen, video, and audio messages. Bubbles is free, and offers unlimited recordings with a click of a button.
.avif)





.avif)